How to Create a Picture Out of Any File or Website
| Tweet |
I want to show you how you can create a picture out of any file: Word doc, PowerPoint slide, Excel spreadsheet, Web page, etc.
(Btw, I've created all the thumbnails in this blog post this way. Each are clickable and will open up into a new window or tab. My first example to the left is of my Pinterest page.)
The way I do it is by simply using the "Print Screen" key on my computer keyboard.
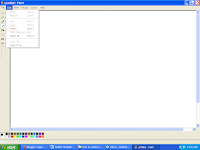
Then what I do is I open Microsoft Paint. (see thumbnail 2 on the right)

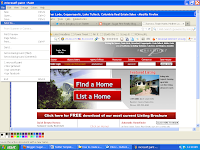
(Start Button > All Programs > Accessories > Paint) In Paint, I choose Edit in the menu bar at the top, then Paste. What was "print screened" to the clipboard now appears on the screen again in Paint.
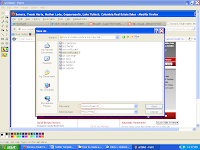
Now, I choose File in the menu bar at the top, then Save As. (see thumbnail 3 on the left) A pop up opens where I can name the file and choose what type of picture file I want it to be. PNG is the best for resolution/clarity. (see thumbnail 4 on the left)


Once you've created your picture, you can use it in a number of ways. You can upload it to your iPad to use in a slideshow presentation. You can post it on Facebook or tweet it on Twitter. (People respond to / interact with pictures the most.) You could add it to one of your boards on Pinterest. (To view a collection of our company sites in this format, click here. The cool thing about Pinterest is you can add a link back to whatever site you want from all your picture/print screen uploads.)
As you can see, there are a number of ways you can use the picture you created. Have fun with it. :)
(Btw, I've created all the thumbnails in this blog post this way. Each are clickable and will open up into a new window or tab. My first example to the left is of my Pinterest page.)
The way I do it is by simply using the "Print Screen" key on my computer keyboard.
Whatever is on the screen at the time you press the "Print Screen" key will be captured to your computer clipboard. Click to Tweet
Then what I do is I open Microsoft Paint. (see thumbnail 2 on the right)

(Start Button > All Programs > Accessories > Paint) In Paint, I choose Edit in the menu bar at the top, then Paste. What was "print screened" to the clipboard now appears on the screen again in Paint.
Now, I choose File in the menu bar at the top, then Save As. (see thumbnail 3 on the left) A pop up opens where I can name the file and choose what type of picture file I want it to be. PNG is the best for resolution/clarity. (see thumbnail 4 on the left)


Once you've created your picture, you can use it in a number of ways. You can upload it to your iPad to use in a slideshow presentation. You can post it on Facebook or tweet it on Twitter. (People respond to / interact with pictures the most.) You could add it to one of your boards on Pinterest. (To view a collection of our company sites in this format, click here. The cool thing about Pinterest is you can add a link back to whatever site you want from all your picture/print screen uploads.)
As you can see, there are a number of ways you can use the picture you created. Have fun with it. :)
| You might also be interested in: |
Labels: homes for sale in pine mountain lake california, how to create a picture, how to post a picture on facebook, how to post a picture on pinterest


3 Comments:
I use a snipping tool that can grab the full screen or any part I wish. After Microsoft Word, is it the top non-Internet software/app I use.
I did a screen shot of our website and pinned it, here it is:
http://pinterest.com/pin/82612974385990858/
Took only a couple mouse clicks to do all of this. I do this in other ways, but wanted to test his method, works great.
It's extremely important to note that you are not "creating" an image but using someone else's work. Make sure that is actually free to share and not copyright protected before using it.
Post a Comment
<< Home